Reading time: 4 – 6 minutes
 With over 500 million registered users on Facebook, it’s somewhere you want to be!
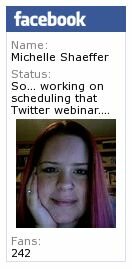
Encourage your website visitors to become friends with you, or like your fan page, by adding a Facebook Badge or Fan Box to your website or WordPress blog with these two easy steps.
1) Get your code from Facebook.
To create a badge, start on your profile page. Scroll down to where the left side column ends and you’ll see a “Create a Profile Badge” link. Click that link. On the new page, you’ll see several options on the left:
|
|
Profile Badge – this will show your photo, name, and other information you choose from your personal profile. |
 |
Like Badge – this will allow you to promote any page that you’re a fan of with a like badge. |
|
|
Photo Badge – this one lets you share photos from your personal profile. |
|
|
Page Badge – to promote your fan page, choose this badge and it will show your fan page title, the latest status update, photo, and number of fans. |
Choose which badge you’d like to create and follow the steps through to the end where you’ll get a snippet of code. Copy that snippet of code.
If you’d like to create a fan box instead that shows your fan page, status updates, and pictures of your fans, you can do that by starting at http://developers.facebook.com/docs/reference/plugins/like-box
Tip: to find your Facebook fan page’s unique ID go to your fan page, right-click on your logo on the top left, and choose “Show Properties” or “Properties.” In the info box that comes up, look at the URL or address of the link. At the end of the URL you’ll see something like &id=1234567890 That number is your fan page’s ID.
Enter your information, customize the settings and click “Get Code” to see your code. Copy the code in the iframe option.

2a) Put your code in a widget on your WordPress blog.
Login to your WordPress admin pages. Under “Appearance” click “Widgets” to go to your widgets page.
Next find the “Text” widget option in the widget boxes in the middle area of the page. Grab it and drag it into the sidebar widget column.
Now open that widget and paste your snippet of code from Facebook into the box.
Save your widget.
Go to your website and make sure it’s displaying properly. If not, double check that the code you copied is correct and save again.
And that’s it! Your new Facebook badge or fan box will display in the widget you created.
2b) Or, add to your website.
If you’re not using WordPress, the steps to add your new badge or box will vary depending on how you’ve created your website. You’ll need to copy the code from step 1 above into the right part of your template or website’s HTML code to add it.
Bonus Tips:
- If you like this, you might also like the plugin fbLikeButton which adds a “Like” button at the top and/or bottom of all of your posts.
- If you’ve got a fan page you don’t know what to post on, check out this blog post with 11 ideas.


 Facebook
 Twitter
 Youtube
 StumbleUpon
 LinkedIn
 RSS
RSS CinchCast
Thanks for the tips Michelle.
Thanks a lot for this info. :)